Catalog excerpts

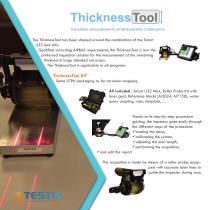
THICKNESS MEASUREMENTS AFTER BLENDING CORROSION The ThicknessTool has been shaped around the combination of the Smart U32 and Ultis. Qualified according AIRBUS requirements, the ThicknessTool is now the preferred inspection solution for the measurement of the remaining thickness in large blended out areas. The ThicknessTool is applicable to all programs ThicknessTool KIT Same UTPA packaging as for corrosion mapping All included : Smart U32 Max, Roller Probe Kit with laser guid, Reference blocks (Al2024, Al7150), water spray coupling, ruler, template, … Thanks to its step-by-step procedure guiding, the inspector goes easily through the different steps of the procedure: loading the setup, calibrating the system, adjusting the scan length, performing the acquisition, and edit the report The acquisition is made by means of a roller probe, equipped with accurate laser lines to guide the inspector during scan.
Open the catalog to page 1
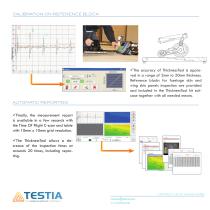
CALIBRATION ON REFERENCE BLOCK The accuracy of ThicknessTool is approved in a range of 2mm to 20mm thickness. Reference blocks for fuselage skin and wing skin panels inspection are provided and included in the ThicknessTool kit suitcase together with all needed means. AUTOMATIC REPORTING Finally, the measurement report is available in a few seconds with the Time Of Flight C-scan and table with 10mm x 10mm grid resolution. The ThicknessTool allows a decrease of the inspection times at arounds 20 times, including reporting. contact us to know more AN airbus group company contact@testia.com...
Open the catalog to page 2All TESTIA catalogs and technical brochures
-
OMA
2 Pages
-
D-LAM TOOL
2 Pages
-
ULTIS
2 Pages
-
CLADTOOL
2 Pages
-
Smart U32
2 Pages
-
Lineview
1 Pages
-
Scratchview
1 Pages
-
moiréview
1 Pages


