Catalog excerpts

More Precision surfaceCONTROL // Inspection of diffusely reflecting surfaces
Open the catalog to page 1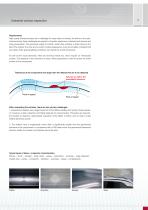
Industrial surface inspection Requirements High quality finished surfaces are a challenge for many areas of industry. As well as in the automotive industry, these challenges are present in domestic appliances, entertainment devices and living accessories. The perceived quality of smooth, defect-free surfaces is determined by the feel of the surface, the color and a uniform surface appearance. Even the smallest of defects that are visible under special lighting conditions can disturb the overall impression. As well as the visual demands, there are technical needs too, which require an...
Open the catalog to page 3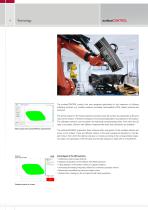
The surfaceCONTROL product line was designed specifically for the inspection of diffusely reflecting surfaces, e.g. metallic surfaces (uncoated, electroplated, EPD), plastic surfaces and ceramics. The sensor based on the fringe projection principle scans the surface and generates a 3D point cloud of this surface. Therefore a sequence of structured light pattern is projected on the surface. The calibrated cameras use this pattern for searching corresponding points, from which the 3D data is calculated. Sensors with different measurement areas and resolutions are available. The surfaceCONTROL...
Open the catalog to page 4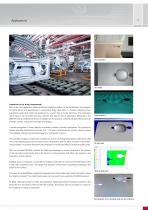
Door component Door handle Inspection of car body components One of the main application fields of surface inspection system is the identification and analysis of deformations and discontinuity in automotive body shell parts. In modern stamping lines, automotive body shell parts are produced in a cycle time of a few seconds. The processes which have to be controlled are very complex and require lots of experience. Because of the different fouling, material tolerances or variations in the process, unwanted shape defects such as pimples, bumps, dents and neckings may appear. Fringe projection...
Open the catalog to page 5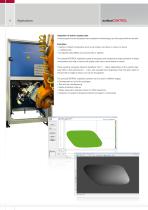
inspection of exterior plastic parts In recent years, the use of plastics has increased in vehicle design, as is the case with the outer skin. Examples; ■ Injection molded components such as car fender, fuel doors or covers on doors or sliding roofs ■ Composite parts (SMC) such as boot lids or spoilers The surfaceCONTROL inspection systems recognize and evaluate the shape deviation on these components and help to reduce the quality costs and to avoid waste or rework. These systems recognize relevant deviations from 5 ... 50pm (depending on the surface) typically within a few seconds (0.5...
Open the catalog to page 6
Inspection of interior plastic parts The overall impression of a vehicle's quality is strongly influenced by its interior. This is why high quality materials, tight manufacturing tolerances and the perfect assembly of interior components are critical. One key aspect is the control panel and dashboard, which can always be seen by the front seat passengers. As well as the visual requirements, functional and security requirements also have to be fulfilled. For this reason, the passenger airbag has a predetermined breaking line which is generated using a laser. This "weak point" ensures the...
Open the catalog to page 7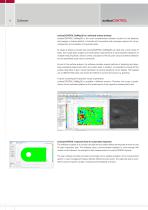
surfaceCONTROL DefMap3D for individual surface analysis surfaceCONTROL DefMap3D is the most comprehensive software solution for the detection and analysis of surface defects. It includes all components and processes required for set up, configuration and evaluation of inspection tasks. Its range of features ensures that surfaceCONTROL DefMap3D can deal with a wide variety of tasks, from single parts analysis and small series measurements to robot-assisted inspection of multiple measuring fields. Sensor control, calculation of the 3D point cloud and defect detection can be automated using...
Open the catalog to page 8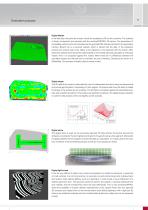
Evaluation process Digital Master In the first step, the parts are chosen, which are accepted as OK by the customer. The surfaces of these components are captured with the surfaceCONTROL 3D sensor. The parameters of acceptable surface forms are calculated via the generated 3D-data and archived in an associative memory. Behind this is a neuronal network, which is trained with the data. In the inspection process the surface data of the object to be inspected is first captured with the sensor. Afterwards the software reconstructs the object based on the trained data and calculates an...
Open the catalog to page 9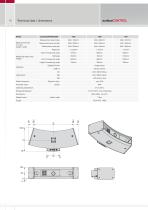
Technical data / dimensions Measurement area (center) Start of measuring range Height of measuring range Measurement area x-/y- axis (length / width) Measurement area (close) Measuring range z-axis (height) Gigabit Ethernet Image output Sensor control Light source Protection class Operating temperature Storage temperature Weight sensor without cable
Open the catalog to page 10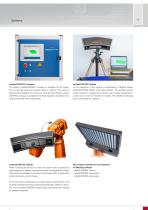
surfaceCONTROL Compact The system surfaceCONTROL Compact is available for the inspection of small test pieces up to about 200mm x 150mm. The sensor is permanently integrated into a housing. Amongst other things, surface CONTROL Compact is suitable for the inline inspection of injection molding and die cast metal components. surfaceCONTROL Mobile For the inspection of the surface of components in different places, surfaceCONTROL Mobile is the ideal solution. The portable system, which consists of a laptop and a sensor, can be safely transported in a carry case. It can be mounted on a...
Open the catalog to page 11
High performance sensors made by Micro-Epsilon Sensors and measurement devices for non-contact temperature measurement 2D/3D profile sensors (laser scanner) Optical micrometers, fiber optic sensors and fiber optics Sensors and systems for displacement and position Color recognition sensors, LED analyzers and color online spectrometer Measurement and inspection systems INB Vision AG · ZENIT Technology Park II Leipziger Str. 44 · 39120 Magdeburg / Germany +49 391 6117-300 · +49 391 6117-301 info@inb-vision.com · www.inb-vision.co
Open the catalog to page 12All Micro-epsilon catalogs and technical brochures
-
wireSENSOR
60 Pages
-
NCDT 3001
7 Pages
-
eddyNCDT 3005
5 Pages
-
NCDT 3070
7 Pages
-
NCDT 3060
9 Pages
-
Non-contact sensors
1 Pages
-
Eddy current sensors
1 Pages
-
P60 analog
19 Pages
-
wire SENSOR MPM analog
9 Pages
-
wire SENSOR MT
8 Pages
-
WDS-2500-P85
2 Pages
-
Wire SENSOR
18 Pages
-
wireSENSOR WPS-K100
2 Pages
-
scanCONTROL
32 Pages
-
optoNCDT
40 Pages


