AE246

AE246
This manual provides comprehensive instructions for maintaining and overhauling Eaton's Aeroquip high-pressure PTFE hose assemblies. It covers maintenance and overhaul procedures for hose assemblies removed from service, instructions for hose assemblies in service, and guidelines for inspection, storage, and disposition.
The hose assemblies meet specifications MIL-H-38360 and AS1339, suitable for high-temperature, 3,000 psi hydraulic and pneumatic systems. Use in other systems is allowed if compatible and approved by Eaton.
The AE246 High Pressure PTFE Hose and reusable 'super gem' fittings are manufactured by Eaton, with additional information on hose assemblies protected with Aeroquip fire sleeve.
The AE246 PTFE hose features a corrosion-resistant steel wire braid covering an extruded PTFE inner tube. Identification includes bulk hose tape and a metal band on factory-assembled hoses with specifications.
Instructions for complete assembly tear-down and cleaning procedures are provided to ensure proper maintenance.
Guidelines for repairing and replacing fire-sleeved hose assemblies are included.
Detailed procedures for hand tool and machine tool assembly methods are outlined to ensure proper fitting.
Equipment and recommended hydrostatic and pneumatic proof test pressures are specified, with detailed procedures for testing and actions if leakage is noted.
Instructions for inspecting, handling, and installing hose assemblies, including routing, clamping, and torque values, are provided.
External and internal inspection procedures for hose assemblies removed from service are detailed, along with inspection of hose end fittings and component parts.
Guidelines for permissible rework on hose assemblies, hoses, fittings, and fire sleeves are included.
Information on the storage of hoses and hose assemblies, including no shelf life for bulk hose, is provided.
General guidelines for the disposition of hose assemblies are outlined.
Details on necessary assembly equipment, special tools, fixtures, and services are provided to facilitate proper maintenance and assembly.
PTFE hoses are shipped in random lengths unless specific lengths are ordered, which incurs an additional charge. The document provides detailed procedures for disassembly, cleaning, repair, replacement, and assembly of hose assemblies.
The disassembly process involves removing band clamps, fire sleeves, and fittings, with specific steps for cutting the hose and inspecting component parts.
Hose assemblies and components should be thoroughly cleaned and degreased, with specific cleaning fluids recommended.
Minor damages to fittings can be repaired, while damaged hoses should have fittings salvaged and the hose scrapped.
Steps for assembling hose fittings include cutting the hose to the correct length and ensuring proper fitting engagement.
Machine tools are recommended for production assembly, with specific equipment and tools listed for sleeve and socket preseating.
Hydrostatic and pneumatic proof tests are recommended, with specific pressures and durations, and safety precautions emphasized.
- Inspection: PTFE hose assemblies should be inspected and replaced during specified maintenance periods or when damage is evident.
- AN-MS Connections: Use two wrenches to remove hose lines, avoiding placing a wrench on the socket of the hose fitting.
- Handling: PTFE hoses tend to preform to their installed shape; handle with care to avoid kinking.
- General Installation: Avoid kinking by careful handling, especially with larger or shorter hoses.
- Routing and Clamping: Securely route and clamp hoses to prevent abrasion and kinking.
- Bending and Flexing: Maintain recommended bend radii and avoid twisting during flexing installations.
- Torque Values: Use appropriate torque values for swivel connections to prevent leaks.
- External Inspection: Check for twisting, kinking, abrasion, and broken wires.
- Internal Inspection: Examine for restrictions or damage using light sources or balls for smaller hoses.
- Hose End Fittings: Inspect for damage that could impair sealing or retention.
- Hose Assemblies: May be shortened by removing one end fitting.
- Fittings: Replacement of damaged swivel nuts is allowed.
- Fire Sleeves: Must be replaced if removed.
- No Shelf Life: No age limitations for high-pressure PTFE hoses.
- Bulk Hose: Store in straight position or large, loose coils.
- Hose Assemblies: Cap or plug ends during storage.
- Scrap unsatisfactory hoses, fittings, and assemblies according to regulations.
- Eaton provides special tools and equipment for hose assembly and offers engineering assistance.
Catalog excerpts

AE246 High pressure PTFE Hose and "super gem" Reusable fittings Assembly and disassembly instructions for hand and machine assembly Powering Business Worldwide
Open the catalog to page 1
EATON Aerospace Group TF100-63C December 2023 www.eaton.com
Open the catalog to page 2
EATON Aerospace Group TF100-63C December 2023 www.eaton.com iii
Open the catalog to page 3
Section 1: Introduction 1. Purpose This manual provides specific instructions for maintenance and overhaul of Eaton’s Aeroquip hose assemblies made of high-pressure poly tetrafluoroethylene (PTFE) hose. Eaton’s Jackson, Michigan facility manufactures Aeroquip products (Federal Code Number 00624). The manual is divided into three areas of maintenance to enable each maintenance group to complete its service within a sequence of sections. The first area, following “Introduction” and “Identification” which are common to all levels, contains the maintenance and overhaul procedures for hose assemblies...
Open the catalog to page 4
Section 2: Identification 1. Identification and construction of AE246 high pressure PTFE hose A. AE246 PTFE hose (Figure 1) conforming to the requirements of MIL -H-38360 and AS1339 has a corrosion resistant steel wire braid reinforcement covering an extruded PTFE inner tube. See Table 1. 3. Fittings All component parts of fittings are impression-stamped with the part number. B. Identification of AE246 PTFE hose 1. Bulk hose Identification — Bulk hose has a tape with black letters specifying Aeroquip hose – size, operating pressure, lot number and hose manufacturer’s code. Tape is located at...
Open the catalog to page 5
4. Hose assemblies All factory assembled hose assemblies are identified with a metal band (Figure 5) containing part numbers, date of assembly, etc. A detailed explanation of the different elements of a hose assembly part number is shown in Figure 6. How to complete assembly part number Basic types of hose assembly numbers are shown below. A detailed explanation of the different elements of the part numbers are given on these pages. AE2460500 E 0184 -► Complete assembly number (hose assembly with straight fittings or elbow on one end only) E 0184 225 -► Complete assembly number (hose assembly...
Open the catalog to page 6
Position angle (Angle of rotation) For assemblies with an elbow fitting on each end, measure the position angle as shown and suffix the angle to the basic style number. The angle is expressed in three digits. For example: 35° would be written as 035. If the angle desired is 0°, specify as 000. The angle shown in the example is 225°. Adjustable elbow fittings are easily positioned through 360° to the desired relative angle between opposite elbow fittings. Mock-up and prototype installation changes are simplified as the position angle can be determined on the actual installation. Assembly length...
Open the catalog to page 7
Section 3: Disassembly 1. Complete assembly tear-down Procedure for salvage of hose assembly components: Step 1. Fire-sleeved hose assemblies only). Remove band ( clamps by cutting clamp “buckles” with hack saw. Remove fire sleeve from hose assembly. (See Figure 7.) Step 2. Place socket in vise and remove nipple assembly by applying wrench to nipple hex. (See Figure 8.) Step 3. Cut hose approximately 1-inch from socket skirt. Step 4. Hold socket firmly in vise. Do not damage socket. Using needle nose pliers, remove the tube from the sleeve and hose reinforcement. (See Figure 8A). The tube may...
Open the catalog to page 8
Section 4: Cleaning 1. General It is recommended that all hose assemblies and component parts be thoroughly cleaned and degreased before inspection. A. Cleaning Hose Assemblies with AE102/624 Fire Sleeve — It is suggested that the fire sleeve be completely removed before cleaning. When cleaning after proof test, installation of a new fire sleeve should be the last operation performed. B. Cleaning Hose Assemblies without Fire Sleeve — Flush hose assembly in cleaning fluid and brush, if necessary, to dislodge deposits. (For information covering F-2244 Hose Wash Stand, contact Eaton's facility,...
Open the catalog to page 9
Section 5: Repair and replacement 1. General Fittings with minor damage may be repaired and reused as follows: A. Hose Assemblies — All hose assemblies with damaged hose shall have end fittings removed and salvaged and the hose scrapped. B. Fittings (Nipple, Sleeve and Socket) — 1. General — Replace all scrapped components. 2. Damaged swivel nuts may be replaced as follows: a. Cut nut down to retaining wire as shown in Figure 9. b. Remove metal shavings and clean fitting. c. Install new nut and drive in new retaining wire (Figure 10). d. Set retaining wire with a punch (Figure 11). Note: If nut...
Open the catalog to page 10
Section 6: Assembly procedure — hand tool method 1. General The following steps should be followed when fabricating hose assemblies from new or salvaged components: Note: Assembly mandrels are not needed for assembly of fittings using hand tool method. A CAUTION Do not salvage used hose or used fire sleeve. Used fire sleeve is defined as sleeve removal from hose assembly. Used hose is defined as hose which has been removed from an installation and returned for replacement. A. Straight swivel fittings — Step 1. Cut hose. Determine hose cut-off length by subtracting cut-off factors from Table 4...
Open the catalog to page 11
Section 6: Assembly procedure — hand tool method Step 2. nstall sockets (size -4 through size -10). Place two I sockets skirt-to-skirt in vise (see Figure 13), and work hose through sockets with a twisting pushing motion. Installing sockets over “neckdown” end of hose will facilitate assembly. (Size -12 only) — Assemble sockets from each end of hose. Note: If tape was left in place to ease socket assembly, it must be removed before additional steps are performed. Step 3. ize tube and flare braid. Place nipple hex in vise. S Push end of hose onto the nipple and work gently to aid in separating...
Open the catalog to page 12
Section 6: Assembly procedure — hand tool method Step 5. ize tube to sleeve. Size tube to sleeve by pushing S hose onto the nipple until the sleeve bottoms against the nipple chamfer. Remove and recheck to be certain that the sleeve is still properly positioned. Again push hose onto the nipple until the sleeve is bottomed against the nipple chamfer. (See Figure 16.) Note: Note: When assembling new fittings no lubrication is needed as component parts are dryfilm lubricated at the time of manufacture. After reuse of the fitting, if undue wearing of the dryfilm or bare metal is observed, the thread...
Open the catalog to page 13All EATON SAS catalogs and technical brochures
 666/667
32 Pages
 601/AE701
2 Pages
 TF100 35D
60 Pages
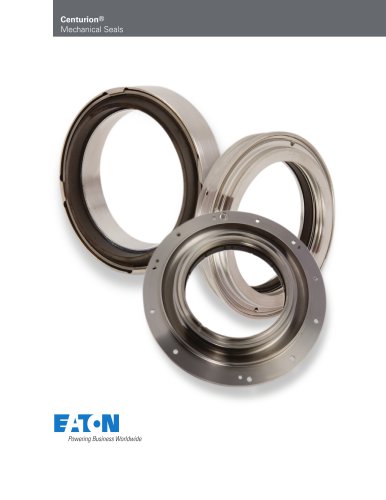 Centurion 800 - TF100 34E
8 Pages
 AS7510
2 Pages
 Engine solutions
4 Pages
Archived catalogs
 Aerospace
8 Pages
 AE645 PTFE Reinforced
8 Pages
 Vickers ® AC Motorpump
4 Pages
 Sikorsky UH-60 Black Hawk
8 Pages
 Bell/Boeing V-22 Osprey
8 Pages
 Carter ® Nozzle Ball Valve
4 Pages
 Boeing C-17 Transport
8 Pages
 Eurofighter Typhoon
8 Pages
 Carter® Ball Valve
4 Pages
 Boeing CH-47
8 Pages
 7202
72022 Pages
 7100
71002 Pages
 39-0001-1100
2 Pages
 9121
91212 Pages
 20026
200262 Pages


